

Solar panels can reduce long-term energy costs, but installing them on a concrete or clay tile roof requires careful coordination between the solar mounting system and the existing roofing assembly. At Tile Roofing San Diego, we frequently find that post-installation roof concerns are not caused by the panels themselves. They develop where installers walked on fragile tiles, modified the roof covering, penetrated the underlayment, attached mounts to the framing, or routed conduit through areas that were not properly flashed.
A tile roof is not simply a layer of decorative clay or concrete. It is a water-management system made up of field tiles, underlayment, flashings, battens or direct-deck attachments, valleys, fasteners, roof decking, and structural framing. Solar installation changes that system in dozens of locations. Every mount, hook, conduit entry, lifted tile, trimmed tile, and worker access path creates an opportunity for damage.
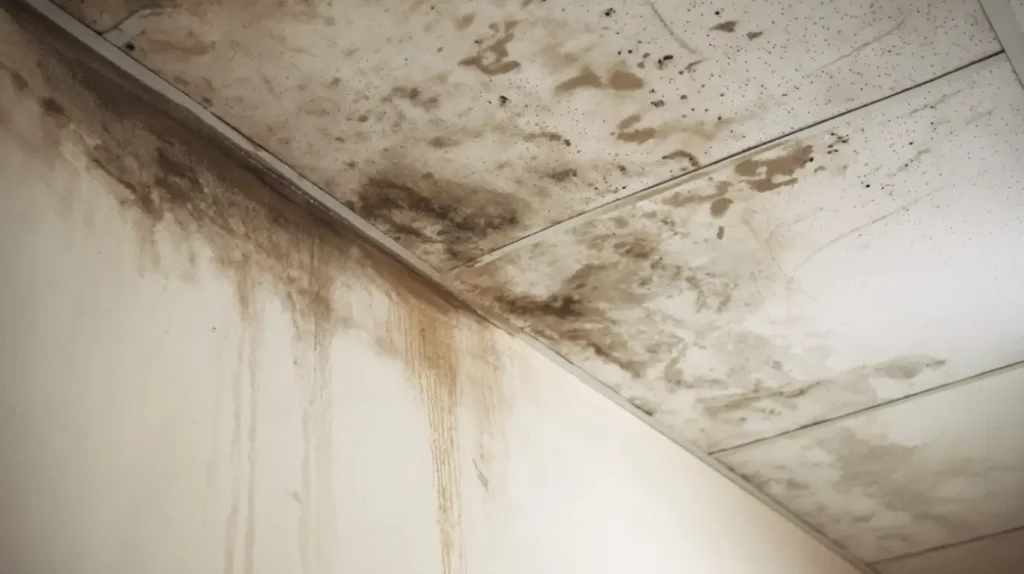
Some problems are visible immediately. Others remain concealed beneath panels until San Diego receives wind-driven rain or the underlayment deteriorates around an improperly sealed penetration. A professional post-solar tile roof inspection helps identify these conditions before minor installation defects become interior leaks, damaged insulation, stained ceilings, wood decay, mold growth, or disputes over responsibility.
Why Solar Installation Is More Complex on a Tile Roof
Asphalt shingles can often be lifted and integrated with conventional metal flashing. Tile roofs require a different approach because individual tiles are rigid, profiled, brittle, and separated from the waterproofing layer beneath them.
Concrete and clay tiles shed most surface water, but wind-driven moisture can travel beneath them. The underlayment and flashing system must redirect that water safely toward the eaves. When a solar attachment passes through a tile or alters the underlayment, the installer must preserve both levels of protection.
The Tile Roofing Industry Alliance guidance on solar systems states that systems penetrating the tile or roof deck should have primary roof-tile flashing and secondary deck flashing. Its related technical guidance summarizes the requirement clearly: “All penetrations require a deck and tile flashing.”
A bead of sealant around a bolt is not automatically an equivalent substitute. Sealant may be one component of an approved detail, but it should not be treated as the entire water-management system when the mount has altered the tile, underlayment, or roof deck.
Contact Us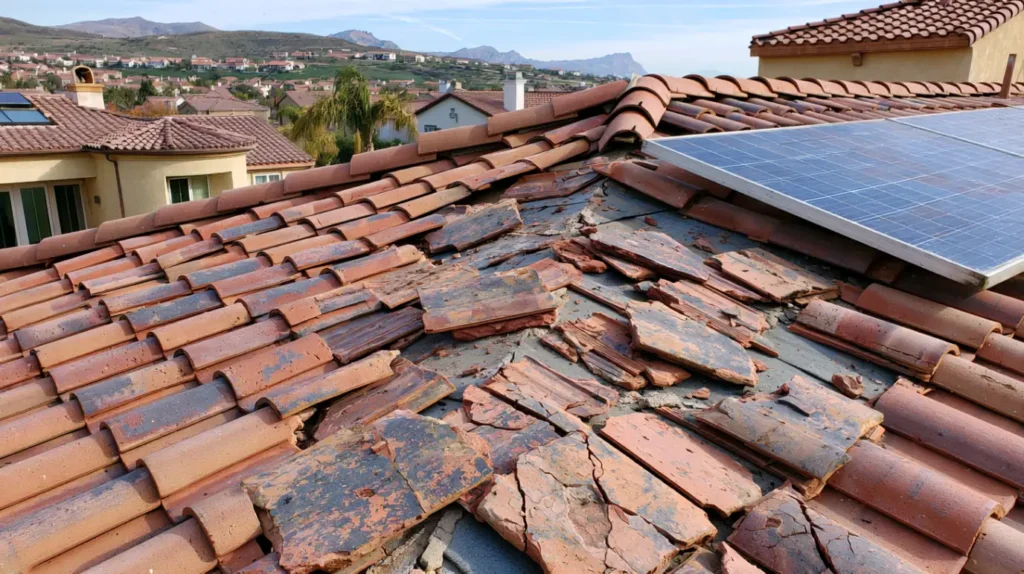
Broken Roof Tiles After Solar Panel Installation
Broken tiles are among the most common post-solar roof concerns because installation crews must repeatedly cross the roof while carrying rails, panels, tools, wiring, and mounting hardware. Tile can support significant environmental loads when installed correctly, but it is vulnerable to concentrated foot pressure.
Foot Traffic Damage
A worker who steps on the unsupported center of a curved tile can create a hairline fracture that is difficult to see from the ground. The tile may remain in place and appear intact until thermal movement, rain, or another service visit causes the crack to widen.
Damage frequently appears along travel routes between ladders, roof edges, panel arrays, electrical equipment, ridges, and attic access points. It can also occur beneath the installed panels, where visual detection becomes more difficult.
Clay tile is particularly vulnerable to impact and point loading, although concrete tile can also crack when walked incorrectly. The risk increases on aged roofs because tiles may already contain minor fractures, weathering, previous repairs, or weakened corners.
Cracks Caused by Improper Grinding
Traditional solar hooks often require installers to remove a tile, fasten the attachment near a rafter, and modify the underside of the tile so it can sit over the hook.
When too much material is removed, the tile becomes structurally weak. When too little is removed, the hook presses upward against the tile. The tile may rock, sit higher than surrounding courses, or crack when the fastener is tightened or the panel system moves.
Grinding can also expose a rough opening that directs water or debris beneath the tile. A properly fitted tile should return to its intended plane without being forced against the mounting hardware.
Point Pressure From Hooks and Mounts
A solar hook should pass through the tile profile without supporting the tile or pressing against it. When the hook is misaligned, too thick for the available space, or installed at the wrong height, it may transfer load directly into the roofing material.
Wind movement and thermal expansion can then produce repeated contact between the metal attachment and the tile. This may lead to cracking long after the solar installation has been completed.
Fastener and Tile Replacement Problems
Tiles are sometimes removed and reinstalled with inappropriate nails, screws, adhesives, foam, or excessive mortar. A fastener placed too tightly can fracture the tile around the hole. A loose or poorly secured replacement tile can slide, lift, or expose the course below.
Replacement tiles must also match the existing profile. An incompatible tile may create elevated edges, open side laps, blocked drainage paths, or gaps that allow wind-driven rain beneath the roof covering.
Hairline Cracks Can Become Hidden Leak Sources
Not every cracked tile produces an immediate ceiling stain. Water may enter beneath the tile and continue flowing over the underlayment without reaching the roof deck. This can create the false impression that the damage is harmless.
The risk increases when the underlayment below the damaged tile has also been cut, punctured, aged, or poorly flashed. Water can then reach fastener holes, sheathing joints, valleys, battens, or structural attachment points.
A hairline crack beneath a solar panel is especially concerning because it may remain shaded, collect debris, and receive little visual attention. The panel array can also complicate access, allowing the condition to worsen before the next roof inspection.
Solar Panel Flashing Problems on Tile Roofs
Flashing should collect and redirect water without depending entirely on exposed sealant. Effective solar flashing must work with the tile profile, roof slope, underlayment, mount type, and natural direction of drainage.
Missing Secondary Deck Flashing
One of the most serious defects occurs when an installer flashes only the visible tile surface but does not properly flash the penetration at the underlayment level.
Water can pass beneath concrete or clay tiles during heavy or wind-driven rain. If it reaches an unprotected lag bolt, mounting base, or cut in the underlayment, it can enter the roof deck even when the upper tile flashing appears acceptable.
A complete detail should address both the visible water-shedding surface and the concealed secondary drainage plane.
Sealant-Only Penetrations
Roofing sealants can dry, shrink, separate, crack, or lose adhesion under prolonged UV exposure and temperature cycling. Compatibility also matters. A product that does not bond correctly to the underlayment, metal, tile, or existing roof cement may fail prematurely.
Large mounds of exposed sealant often indicate an attempt to compensate for an incomplete flashing detail. The amount of sealant does not confirm that the attachment was integrated correctly with the roof assembly.
Reverse-Lapped Flashing
Roofing components must generally be layered so water flows over the upper component and onto the lower component. When a flashing is reverse-lapped, water is directed behind it instead.
This condition can occur when an installer slides flashing over the wrong underlayment layer, cuts the underlayment incorrectly, or seals the bottom edge in a way that traps water. Reverse laps may not leak during light rain but can fail during prolonged or wind-driven exposure.
Incorrect Flashing for the Tile Profile
Flat tile, low-profile tile, S-tile, W-tile, and traditional barrel tile have different shapes and drainage characteristics. A universal component may require precise field modification, while a tile-replacement flashing must match the existing profile closely.
An incorrect flashing can prevent surrounding tiles from seating properly. It may also create a dam, open joint, or elevated edge that catches runoff and debris.
Flashing Located in a Drainage Channel
Mounts should not obstruct natural water channels between tile ribs. Hardware placed in the lowest part of a curved tile profile may receive concentrated runoff.
Debris can collect around the obstruction, slowing drainage and directing water beneath adjacent tiles. In San Diego neighborhoods affected by leaves, palm debris, dust, or coastal residue, even a small obstruction can become a recurring moisture problem.
Roof Penetration Problems Beneath Solar Panels
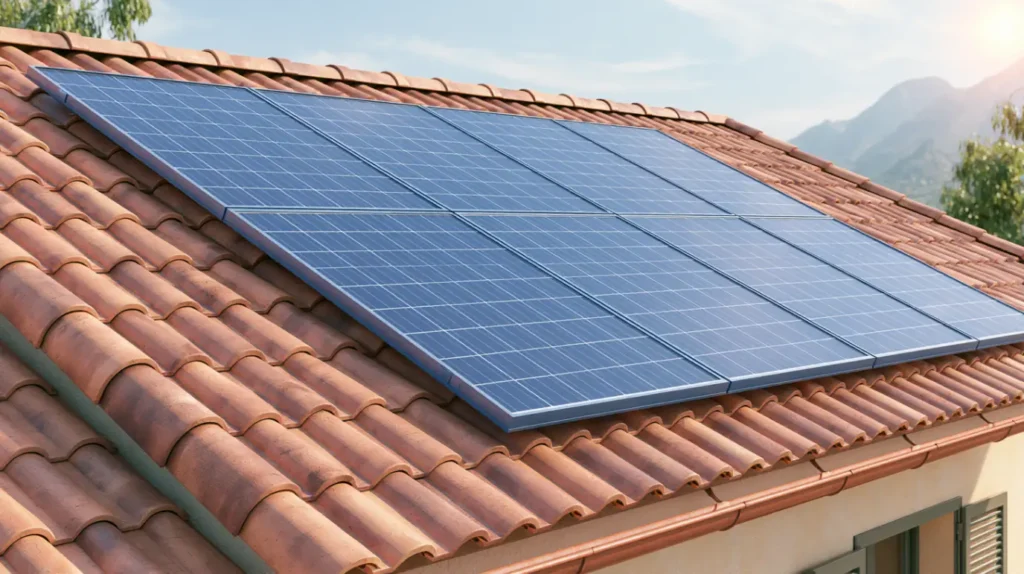
Solar mounting systems are normally attached to rafters, trusses, structural blocking, or another engineered substrate. The attachment must resist gravity, wind uplift, and movement without compromising the roof.
Lag Bolts That Miss the Rafter
A lag bolt intended for structural framing may pass beside the rafter and secure only into roof sheathing. This can reduce attachment strength and leave an unnecessary hole through the waterproofing layers.
Evidence may include several abandoned pilot holes, excessive sealant around the mount, a visibly tilted attachment, or multiple attempts to locate framing.
Overdrilled or Abandoned Holes
Installers may drill exploratory holes while searching for a rafter. Every unused hole should be repaired with a method appropriate for the deck and underlayment—not merely hidden beneath a tile.
An abandoned hole can become a direct water path. Because it is concealed beneath the mounting area, the resulting moisture may first appear in the attic rather than on the roof surface.
Split or Damaged Framing
An oversized fastener, poorly positioned pilot hole, insufficient edge distance, or overtightened lag can split a rafter. Older framing may be more vulnerable where wood is dry, previously drilled, notched, deteriorated, or already carrying other rooftop equipment.
Structural damage requires more than surface patching. The attachment and framing should be evaluated before the system is returned to service.
Damaged Underlayment Around the Mount
Removing tiles can tear aged felt, synthetic underlayment, or existing repair membranes. Tools, boots, fasteners, and sharp metal components can also puncture the material.
A small underlayment cut may not be visible after the tile is reset. During an inspection, we look for irregular patches, exposed fastener holes, improper sealant, incomplete laps, and signs that the membrane was stretched or damaged around the attachment.
Conduit and Electrical Penetration Leak Risks
Solar arrays require electrical wiring between modules, junction boxes, inverters, batteries, disconnects, and the service panel. Conduit routing can create separate roof problems unrelated to the panel mounts.
A conduit penetration should have a compatible flashing and weatherproof detail. Running conduit through an improvised hole in a tile, sealing around it with exposed caulk, or routing it through a vulnerable roof-to-wall intersection creates unnecessary leak risk.
Conduit supports can also damage tiles when fastened directly through them without appropriate flashing. Loose conduit may move in the wind, placing repeated stress on attachments and surrounding roofing materials.
Low or poorly positioned conduit can trap leaves and sediment. Junction boxes and wire management components should not rest directly on tiles or block drainage paths.
Why Solar-Related Roof Leaks May Appear Months Later
A leak does not always begin during the first storm after installation. Several conditions can delay visible symptoms:
- A cracked tile may continue shedding most water until the crack widens.
- Sealant may initially remain flexible and later separate under UV exposure.
- A missed rafter may allow the mount to move gradually under wind loading.
- Moisture may enter the roof but remain trapped in insulation before staining drywall.
- Water may travel along a rafter, wire, fastener, or underlayment seam before becoming visible.
- Debris may accumulate beneath the array and alter drainage over time.
- A minor flashing defect may leak only during rain arriving from a particular direction.
This delayed pattern is why a dry attic immediately after installation does not conclusively establish that every roof attachment is watertight.
San Diego Conditions That Expose Installation Defects
San Diego tile roofs experience intense sunlight, warm roof-surface temperatures, coastal moisture, occasional heavy rain, and periods of strong wind. These conditions test different parts of a solar installation.
UV exposure can age unprotected sealants and exposed repair materials. Daily heating and cooling create movement between aluminum rails, steel fasteners, wood framing, concrete or clay tile, and roofing membranes.
Marine-layer moisture may keep shaded areas beneath panels damp for longer periods. Strong winds can place uplift forces on the panel array and its attachment points. When rain accompanies wind, water may travel beneath tiles that ordinarily perform well during vertical rainfall.
Solar panels can also create shaded zones where leaves and debris remain longer than they would on an open roof. The resulting buildup may block channels, hold moisture against the tile, or conceal broken roofing materials.
Permits Do Not Replace a Tile Roof Inspection
Solar permitting is essential, but permit approval should not be confused with a detailed roof-condition assessment. The City of San Diego Information Bulletin 301 requires roof plans to show panel locations relative to ridges, hips, valleys, roof slope, system weight per square foot, and roof-connection details. It also requires manufacturer specifications for panels and racking.
The May 2026 bulletin identifies structural-review triggers that include a PV system exceeding six pounds per square foot, roof-mounted equipment exceeding 400 pounds, or mounting height greater than 24 inches above the roof. Certain qualifying residential systems up to 38.4 kW may be self-issued without plan review when no structural modification or additional review is required.
These requirements address permitting, electrical safety, structural design, product listings, fire access, and approved plans. A post-solar roof inspection addresses a different question: whether the actual work left the tile roof, underlayment, flashing, drainage paths, and penetrations in serviceable condition.

Warning Signs of a Solar Panel Roof Leak
Homeowners, HOA boards, and property managers should request an inspection when any of the following conditions appear after solar installation:
- New ceiling stains, bubbling paint, or drywall discoloration
- Damp insulation or water marks in the attic
- Cracked, slipped, lifted, or missing tiles near the array
- Tiles that sit higher than neighboring courses
- Visible gaps around hooks or replacement flashings
- Heavy sealant buildup around mounts or conduit
- Debris trapped along the lower edge of the panels
- Rust stains, dark streaks, or white mineral deposits
- Dripping near rafters, wiring, junction boxes, or penetrations
- Unexplained musty odors after rain
- Water appearing only during wind-driven storms
- Tiles broken along the installer’s access route
Active electrical equipment should not be touched during a leak. Water near inverters, batteries, disconnects, wiring, or energized components requires immediate coordination with a qualified solar or electrical contractor.
What a Post-Solar Tile Roof Inspection Should Include
A useful inspection should document conditions both around and beneath accessible portions of the solar array.
Tile Condition and Installation Paths
We inspect the panel perimeter, access routes, ridges, valleys, hips, eaves, and areas around electrical equipment. Cracks may be visible as dark lines, displaced corners, fresh breaks, adhesive patches, or tiles that no longer align with adjacent courses.
Mounting and Flashing Details
Accessible attachments should be checked for tile contact, improper grinding, lifted tiles, open joints, misaligned flashing, sealant dependency, exposed fasteners, and blocked drainage.
Where conditions justify limited tile removal, the inspection may include the concealed underlayment and deck-flashing detail around selected mounts.
Attic and Interior Evidence
An attic inspection can reveal water stains, corroded fasteners, wet insulation, darkened framing, roof-deck deterioration, or daylight around penetrations. Moisture meters can help compare suspect materials with dry reference areas.
Infrared imaging may identify temperature anomalies associated with moisture, but it does not prove the source by itself. Results should be interpreted alongside visible roof and attic evidence.
Conduit, Junction Boxes, and Roof Entries
We evaluate whether conduit penetrations are flashed, whether supports have damaged tiles, and whether wiring components interfere with drainage. We also look for abandoned penetrations from layout changes during installation.
Photo Documentation
Date-stamped photographs should identify the panel section, roof plane, attachment location, tile damage, flashing concern, and corresponding attic area whenever possible.
Clear documentation is important when responsibility may involve a homeowner, solar contractor, roofing contractor, HOA, property manager, tenant, or equipment owner.
Post-Solar Inspection Guidance for HOAs
Solar projects within an HOA can affect both individual property rights and shared building responsibilities. The approval process should distinguish between architectural appearance, electrical work, structural attachment, and the integrity of the roofing system.
Before installation, an HOA should consider requiring:
- A roof-condition report with photographs
- The proposed array and attachment layout
- Mounting-system and flashing specifications
- Contractor license and insurance information
- Written responsibility for broken tiles and leaks
- Procedures for preserving existing roof warranties
- Access provisions for future maintenance
- A plan for panel removal and reinstallation during reroofing
- Matching replacement tiles stored for future repairs
- Final inspection photographs and approved permit records
For attached condominiums and townhomes, the governing documents should be reviewed to determine who owns and maintains the roof, underlayment, framing, and solar system. A panel array serving one unit can still create water intrusion affecting common framing or an adjoining residence.
A post-installation roof report gives the HOA a documented closeout condition rather than waiting for the first leak complaint.
Property Manager Documentation and Risk Control
Property managers should preserve a clear timeline from pre-installation condition through project completion. Before work begins, the roof should be photographed so pre-existing cracks, patches, wear, and underlayment concerns are not confused with installation damage.
After the work, the file should include:
- Executed contracts and warranty terms
- Approved plans and permit records
- Racking and flashing product information
- Installer and subcontractor details
- Pre-installation and post-installation photographs
- Roof inspection findings
- Repair invoices and correspondence
- Dates of rain events and reported interior moisture
- Panel ownership, lease, or power-purchase documents
- Requirements for future detach-and-reset work
This documentation reduces uncertainty when a leak is discovered several months or years later.
How Solar-Related Tile Roof Problems Are Repaired
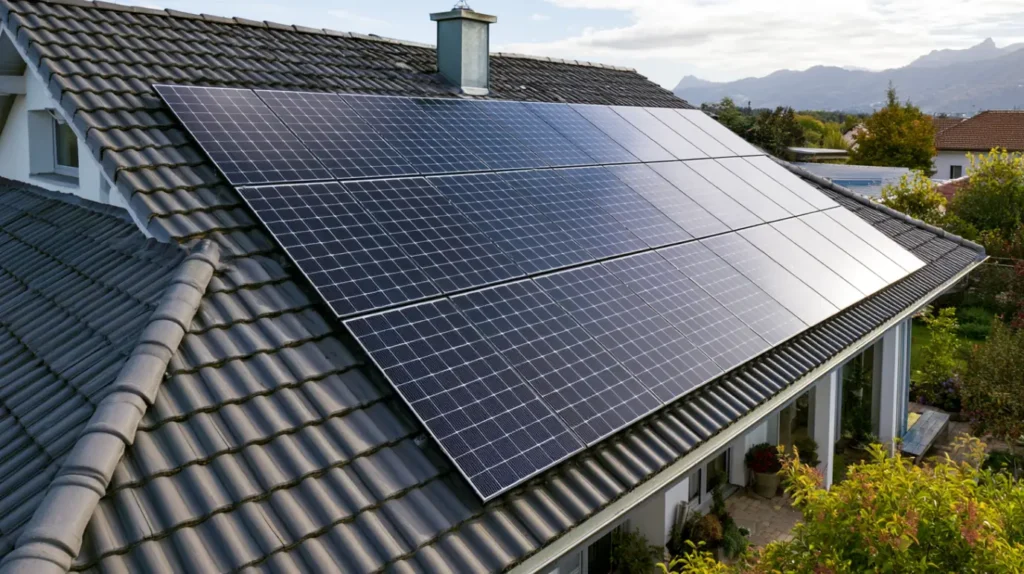
The repair scope depends on whether the defect involves only the roof covering or extends into the solar attachment, underlayment, deck, or framing.
Broken tiles outside the panel field may be replaced without disturbing the array. Damage directly beneath panels may require temporary panel removal by a qualified solar professional.
Improper mounts may need to be disconnected, removed, repositioned over structural framing, and reinstalled with compatible deck-level and tile-level flashing. Damaged underlayment may require a localized repair or a larger lift-and-relay area when multiple penetrations are affected.
Wet or decayed decking must be exposed and replaced. Split framing may require engineered reinforcement. Abandoned holes should be repaired at the deck and underlayment levels rather than covered with a replacement tile alone.
The City of San Diego states that when existing roof-mounted PV equipment is removed for renewal of the roof covering, reinstallation requires appropriate permitting and must be performed by a qualified C-10 or C-46 contractor. Coordination should therefore be planned before panels are detached.
When to Schedule a Post-Solar Tile Roof Inspection
The most effective time is shortly after installation, while project records are current and before final closeout issues become difficult to resolve. An additional review after the first substantial rain can identify moisture entry that was not visible during dry conditions.
An inspection should also be scheduled when:
- The installer reports broken tiles
- A different contractor performed last-minute roof repairs
- The original roof was already approaching the end of its underlayment life
- The property changes ownership
- The solar company closes or changes service providers
- Panels must be removed for roofing work
- The HOA receives a leak complaint
- The attic develops new staining
- A severe wind or rain event affects the property
- No roof documentation was provided after installation
Prompt inspection protects evidence as well as the building. Continuing water intrusion can enlarge the damaged area and make the original source more difficult to isolate.
Conclusion
Solar energy and tile roofing can perform successfully together when mounts are structurally secured, tiles remain properly seated, penetrations receive complete flashing, and water continues to flow through the roof assembly as designed. Broken tiles, sealant-only mounts, damaged underlayment, misplaced flashing, abandoned holes, and poorly routed conduit can turn an otherwise functional roof into a concealed leak risk. A professional post-solar tile roof inspection provides San Diego homeowners, HOAs, and property managers with documented evidence of the roof’s condition and a practical repair plan before installation defects cause interior damage.